Showing posts with label baking. Show all posts

Saturday, February 21, 2009

I've Started Another Blog

Alright, I've finally gone and done it.  I've start a cooking/baking/recipe blog of my own!  I knew it would happen eventually.  After all, I love cooking/baking and there are just SO many recipes to try and to write about.  Plus, there are so many cooking blogs that I love reading...I just had to jump on the bandwagon.  Hopefully, my cooking/baking/recipe blog will someday be as good as some of my favorite blogs. 

Also,  I didn't want to totally take away from this blog and the exciting adventures of Jeremy and (me) Sara, by just blogging about cooking all the time! :)  So, every once and awhile stop by my other blog, "Sara's Sweets," and let me know what you think.

Wednesday, December 3, 2008

First Cookies of the Season

Last night I had the honor of baking the first Christmas cookies of the season!  At work today we had a Mexican and Italian themed holiday luncheon.  I sign up to bring a dessert, so I decided to bring Mexican Wedding Cookies!  Have you had these cookies before?  They are so easy to make and quite delicious.  Plus, they look like little snowballs...how Christmasy!  I have been making them at Christmas time for the past few years and they are always a hit.  As usual, I used whole wheat flour and I did not have enough pecans, so I used almonds too.  I didn't get to try one (there were too many other goodies to eat), but they were all gone by the end of the day...so they must have been good.  Enjoy!

 IMG_1014[2]

Ingredients.

  IMG_1016[2]

Hot cookie being rolled in powered sugar.

 IMG_1017[2]

Finished.

Mexican Wedding Cookies

by Paula Deen

1 cup unsalted butter, at room temperature

1/2 cup confectioners’ sugar, plus more for coating baked cookies

1 teaspoon vanilla extract

1 3/4 cups all-purpose flour, plus more for dusting hands

1 cup pecans, chopped into very small pieces

  1. Preheat the oven to 275 degrees F. Line cookie sheets with parchment paper.
  2. Using an electric mixer, cream the butter and sugar at low speed until it is smooth.
  3. Beat in the vanilla.
  4. At low speed gradually add the flour.
  5. Mix in the pecans with a spatula.
  6. With floured hands, take out about 1 tablespoon of dough and shape into a crescent. Continue to dust hands with flour as you make more cookies.
  7. Place onto prepared cookie sheets. Bake for 40 minutes.
  8. When cool enough to handle but still warm, roll in additional confectioners' sugar. Cool on wire racks.

Thursday, November 27, 2008

Delicious Thanksgiving Recipes!

Per my previous post, you'll see that we had a delicious Thanksgiving.  Since cooking and baking are my hobbies, I wanted to pass on a few of my favorite recipes from this Thanksgiving.  They are all awesome recipes and I hope that you enjoy them as much as we do.  Below are the recipes for my Sugar and Spiced Nuts, my mom's Pumpkin Squares and my mother-in-law's Strawberry Jello Pretzel Salad.  I only took pictures of the nuts, so you'll have to use your imagination for the other two. :)

 IMG_1011[2]

Sugar and Spiced Nuts ingredients.

 IMG_1012[2]

Mixing it all together.

 IMG_1013[2]

Finished!

Sugar and Spice Nuts

by Recipezaar

1/4 cup packed brown sugar

1/2 teaspoon ground cinnamon

1/4 teaspoon cayenne pepper

1 egg white

1 cup salted cashews (*I used 3 cups of Mixed Nuts, which included almonds, cashews, Brazilian Nuts, etc.*)

1 cup pecan halves

1 cup dry roasted peanuts

1/2 cup dried cranberries

  1. In a small bowl, combine he brown sugar, cinnamon and cayenne; set aside. In a large bowl, whisk egg white; add nuts and cranberries.
  2. Sprinkle with sugar mixture and toss to coat.
  3. Spread in a single layer on a greased baking sheet.
  4. Bake at 300° for 18-20 minutes or until golden brown, stirring once.
  5. Cool before storing.

Gretchen's Pumpkin Squares

*This dessert is the reason I look forward to Thanksgiving and Christmas!  I have loved it since I was a kid.  It's a delicious combination of pumpkin pie and buttery cake.  YUM!

1 (29 oz.) can solid pack pumpkin

4 eggs

1 c. sugar

1 (13 oz.) can evaporated milk

2 tsp. pumpkin pie spice

1 tsp. cinnamon

1 tsp.salt

1 box yellow cake mix

1/2 c.(1 stick) butter, melted

1 c. chopped walnuts (optional)

  1. Grease and lightly flour a 9 x 13 inch cake pan.
  2. Mix pumpkin and eggs together on medium speed with mixer.  Add  in sugar, milk, and spices.  Pour into pan.
  3. Mix together cake mix and butter to form crumb mixture.  Spread over pumpkin. Top with nuts and press down gently.
  4. Bake at 375 for 50 to 60 minutes or until toothpick inserted in center comes out clean. Cool and serve with Cool Whip or vanilla ice cream.

Belinda's Strawberry Jello Pretzel Salad

*This dessert is probably the reason Jeremy looks forward to Thanksgiving and Christmas.  I HATE Jello!  I can't stand the way it jiggles, but I love this dessert and it is the only way, shape or form that I'll eat Jello!  It's a delicious combination of sweet Jello and cream cheese, with a salty pretzel crust.  YUM!

3/4 cup melted butter

2 cups crushed pretzels

2 tbs sugar

8 oz. cream cheese

1 cup sugar

8 oz. Cool Whip

1 large package of Sugar Free Strawberry Jello

2 cups boiling water

2 10 oz. packs of frozen strawberries

1/2 cup cold water

  1. Combine butter, pretzels and 2 tbs. sugar.  Press into a greased 13x9 inch baking dish.  Bake at 250 for 15 minutes.  Let cool.
  2. Mix cream cheese and cup of sugar.  Add Cool Whip.  Spread on top of crust.  Cover and chill.
  3. Mix Jello and boiling water.  Add cold water and frozen strawberries.  Mix together on and off for 30-40 minutes, until it has a jelly consistency.  Pour onto previous layers.
  4. Cover and refrigerate over night.

I hope you enjoy these delicious recipes as much as my family does!

Thursday, October 2, 2008

Blue Ribbon Almond Roca Cookies

I've said this before and I'll say it again...I LOVE COOKIES!  I'm a huge fan of any and all types of cookies.  A few months ago, I got to talking with my friend, Kayla, about toffee and Almond Roca.  I mentioned that I had a great recipe for Almond Roca Cookies and that I would make her some.  Well, life got in the way and I got busy, but since I'm not one to tease about cookies, I finally got around to making them the other night and they did not disappoint! 

This is a Food Network recipe from one of Emeril's holiday shows a few years ago.  On the show he had some of the viewers best cookie recipes and once I saw this one I just had to make them.

These cookies are really easy to through together and the only trouble I had was finding toffee bits!  Has anyone else run into this problem?!  I went to 3 grocery stores and they did not carry them.  Then, I went to Wal-Mart and they were all out!  The closest I could find was a mix of toffee bits and milk chocolate pieces.  Maybe toffee bits are just more of a holiday item?

Anyway, I highly recommend these cookies for those of you who like Almond Roca!  They are delicious, covered in almonds and then drizzled with chocolate.  Yum!  As usual, I used whole wheat flour and subbed egg whites.  I personally like to leave these cookies in the frig so that the chocolate stays nice and firm, while the cookies have a cool, crisp texture, but they are great at room temperature too.

Enjoy! (Glad you liked them, Kayla!)

IMG_0921

Dough balls, rolled in almonds and ready to hit the oven.

IMG_0922 

Cooled cookies.

IMG_0923

Melting the chocolate.

IMG_0924

Finished cookies!

Blue Ribbon Almond Roca Cookies

Recipe courtesy Lynn Scully, Rancho Santa Fe, California

Makes approximately 4 dozen

Ingredients

  • 2 1/2 cups all-purpose flour
  • 1/2 teaspoon baking soda
  • 1/4 teaspoon salt
  • 1 cup dark brown sugar
  • 1/2 cup sugar
  • 1 cup butter, room temperature
  • 2 eggs, room temperature
  • 2 teaspoons pure vanilla extract
  • 1 package toffee bits
  • 1 cup coarsely ground almonds
  • 4 ounces milk chocolate
  • 1/2 tablespoon vegetable oil

Directions

Preheat oven to 300 degrees F.

In a medium mixing bowl, whisk together flour, baking soda, and salt. Set aside. In the bowl of an electric mixer, blend sugars together on medium speed. Add butter and mix to form a grainy paste. Add eggs and vanilla and mix at medium speed until light and fluffy. At low speed, slowly add the flour mixture and then the toffee bits. Mix until just blended; do not over-mix.

Place ground nuts in a small bowl. Using hands, roll balls of dough into 1 to 1 1/2-inch balls, then roll in the ground nuts. Place on cookie sheets several inches apart. Bake approximately 22 minutes and then transfer cookies to a cooling rack.

Melt the chocolate with the vegetable oil in a double boiler or in a bowl set over a pan of simmering water. Drizzle melted chocolate over cooled cookies. Place cookies on a cookie sheet and place in freezer or refrigerator until chocolate is firmly set.

Sunday, September 28, 2008

I Love Pumpkin!

 Ever since the first day of Fall last week, a lot of the foodie blogs that I read have been posting pumpkin recipes.  I LOVE pumpkin!  So, I was inspired to jump on the pumpkin bandwagon and bake something scrumptious. 

This afternoon I baked this incredible Pumpkin-Gingerbread Loaf.  I've always loved regular pumpkin bread (thanks to my mom at Christmas time) and this bread adds the ginger element, which just makes it outstanding.  It's moist and comforting with the pumpkin flavor and then it's got a slight ginger kick.  YUM!  I could easily eat half a loaf or 3-4 muffins...it is THAT good.

IMG_0919[2]

I found the recipe a few years ago on Recipezaar.  Since I'm always trying to make recipes a bit healthier, I cut back on the sugar by 1/2 a cup, used whole wheat flour and subbed half egg whites for the eggs.  It's not much of a "healthy" modification, but I figured even a little bit could make it more figure friendly.  The recipe makes 2 big loafs (9-inch pans).  I like to make 1 loaf and 12 muffins, so that I can have somewhat of portion control. :)  It also freezes really well.  If you decide to do muffins, they'll take about 22 minutes to bake.  Seriously, you have to make this bread...it is AMAZING and a wonderful Fall treat!

   IMG_0916

Ingredients.

IMG_0917

12 muffins - 1 due to Quality Assurance. :)

Pumpkin Gingerbread Loaf

by Recipezaar

  • 1 cup margarine
  • 3 cups sugar
  • 4 eggs
  • 3 1/3 cups flour
  • 2 teaspoons baking soda
  • 1/2 teaspoon baking powder
  • 1 1/2 teaspoons salt
  • 1 teaspoon cinnamon
  • 1 teaspoon nutmeg
  • 4 teaspoons ginger
  • 1/2 teaspoon clove
  • 2/3 cup water
  • 2 cups canned pumpkin
  • 1 cup nuts (optional)
Directions
  1. Cream together margarine, sugar, and eggs.

  2. Combine all dry ingredients and add to creamed mixture alternately with water and pumpkin.

  3. Beat well.

  4. Pour into 3 well greased loaf pans.

  5. Bake at 350 degrees for 55-60 minute or until toothpick comes out clean.

Sunday, September 21, 2008

A Chance to Bake

Well, in my brief return home this weekend I asked Jeremy if he wanted me to bake him some cookies or just buy him some.  Luckily for me (and my love for baking), he said he'd rather me to bake him some!  Yay!  So, I decided to make him some "Oh My D-Lux Chocolate Chip Cookies."  I've made him these multiple times before and he's rather fond of them, so he's enjoying a few as right now, as I type.

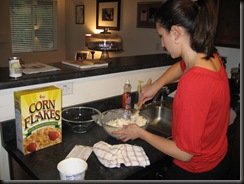
I found this recipe on Recipezaar and they are very tasty.  They include cereal, shredded coconut, nuts and of course, chocolate chips!  The combination of all the chunky ingredients creates a delicious and great texture for the cookie.  I used Corn Flakes, instead of Rice Krispies, left out the nuts (didn't have any) and subbed 1/4 cup of applesauce for 1 egg, since I forgot to buy more at the store earlier.  I also used Smart Balance 50/50 Butter Blend and I've decided that I don't like using this for baking!  As my cookies cooled, I noticed that they got really crispy (as did some cookies that I had previously made with this butter), instead of staying nice and soft (a general result of real butter).  Has anyone else used this Smart Balance butter and found the same result?  Oh well, the cookies are definitely still edible!

These lip smacking treats are easy to throw together and hard to stop eating!  I think I've already had four! :)  Enjoy!

 IMG_0910[2]

Ingredients.

 IMG_0911[2]

Mixing everything together with my PINK mixer.

 IMG_0913[2]

Finished cookies!

Oh My D-Lux Chocolate Chip Cookies

by Recipezaar

Ingredients

1 cup butter, softened

2 cups firmly packed brown sugar

2 large eggs

1 teaspoon vanilla

2 cups flour

1/2 teaspoon baking powder

2 cups Rice Krispies

1-2 cup semi-sweet chocolate chips

1 cup sweetened flaked coconut

1 cup chopped walnuts or pecans

Directions
  1. Preheat oven to 350°F.

  2. Cream butter and add sugar, beating at low speed until light and fluffy.

  3. Add eggs and vanilla and beat well.

  4. Combine flour and baking powder and add to creamed mixture until well combined.

  5. Stir in remaining ingredients.

  6. Drop by heaping teaspoonfuls (or roll into 1 inch balls) onto baking sheets.

  7. Bake for 10-12 minutes or until lightly browned.

  8. Cool on wire racks.

Friday, August 22, 2008

Moist Molasses Bran Muffins

IMG_0894

I made these muffins a while ago with the intent to post about them, but life got in the way and I forgot until now. In my boredom one Saturday morning, while Jeremy was at work, I decided to make some muffins. I'm a big fan of muffins, especially oat/bran/healthy kind and these were delicious! The recipe is from the Bob's Red Mill website. Since I'm not a huge fan of raisins, I subbed craisins for them and the muffins turned out great! They are quick, easy, tasty and healthy.

IMG_0891[2]

Ingredients.

 IMG_0892[2]

Mixed and ready to pour.

 IMG_0893[2]

Cooling.

Moist Molasses Bran Muffins

INGREDIENTS:

1 cup Wheat Bran
1 1/2 cups Whole Wheat Flour
1/2 cup Raisins (Unsulfured)
1 tsp. Baking Powder
1 tsp. Baking Soda
1 cup Milk
1/2 cup Molasses (or Honey)
3/4 cup Applesauce
1/4 cup chopped Nuts
2 Tbsp. Oil
2 Eggs, beaten

Preheat oven to 400°F. Combine wheat bran, flour, baking soda an baking powder. Stir in nuts and raisins. In a separate bowl, blend applesauce, milk, molasses, oil and egg. Add to dry ingredients and stir just until moistened. Spoon into greased muffin tin (or paper muffin cups) and bake for 15-20 minutes. Makes 12 marvelous muffins.


NUTRITIONAL INFORMATION
Serving Size: 1 Muffin
Calories 180, Calories from Fat 50, Total Fat 6g, Saturated Fat 1g, Cholesterol 35mg, Sodium 180mg, Total Carbohydrates 32g, Dietary Fiber 4g, Sugars 14g, Protein 5g.

Thursday, August 7, 2008

Oreo and Kit Kat Cookies!!

IMG_0899

Alright, here is our first post for August...can you believe it's August already?  Where has the time gone?   Sorry for the lack of blogging, I'll try to pick it up.   

As you all know, I love baking and I love cookies!  However, I'm not a huge fan of store bought packaged cookies (besides Oreo's and Mother's Taffy cookies)...I like homemade one or freshly baked ones from store. 

Tonight I decided to make some cookies as a treat for Jerm and me.  A few weeks ago, I made Picky Palate's Oreo Chocolate Chip Cookies (one of my favorite foodie blogs) .  Oh my gosh, they were so good.  We still had all the ingredients, therefore I decided to make them again.  As I pulled things together, I realized that I didn't have chocolate chips...but I did have 2 Kit Kat bars...hmmm.  Kit Kat's AND Oreo's in a cookie?!  Sign me up for that!  So, I just subbed the chopped up Kit Kat bars for the chocolate chips.  Of course, they turned out delicious...but honestly, what wouldn't be delicious with Oreo's and Kit Kat's?

IMG_0895

Ingredients

IMG_0896

Chopping up the Kit Kat bars

Chocolate Chip Oreo Cookies

by Jenny of Picky Palate

1 stick softened butter
6 Tablespoons sugar
6 Tablespoons brown sugar
1 egg
½ teaspoon vanilla
1 ¼ Cup flour
½ teaspoon baking soda
½ teaspoon salt
8 broken pieces Oreo Cookies
1 Cup chocolate chips

1. Preheat oven to 350 degrees F. Cream butter, and sugars until well combined. Add egg and vanilla until mixed well.

2. Place flour, baking soda and salt into a large bowl, stir to combine. Slowly add dry ingredients to wet ingredients then stir in oreos and chocolate chips until just combined.

3. With a medium cookie scoop, scoop onto a parchment or silpat lined baking sheet. Bake for 7-9 minutes or until cooked, but still soft. Let cool on baking sheet for 3 minutes before transferring to cooling rack.

 IMG_0898

Yummy, yum, yum!

Wednesday, July 23, 2008

Amish Friendship Bread

Amish Friendship Bread is going around Prescott and Prescott Valley and it is delicious! We received our first two starter bags about two weeks ago from Jake and Kayla. I had never heard of it before, but I was very excited to have to take care of the dough and bake the bread.

Amish Friendship Bread is a type of sourdough starter that is often shared in a manner similar to a chain letter. The sweet, cake-like cinnamon bread is a common bread that is made from this starter. It has characteristics of both pound cake and coffee cake.

With Amish Friendship Bread, you receive a bag of starter dough and "take care" of it for 10 days. On day 10, you add some ingredients, make additional starters from your batch and then bake your bread. During our 10 day "taking care" period, we were on our trip to Lake Powell. I decided to bring the bread dough with us, since it had to be "taken care of." On day 6, you are to add some sugar, flour and milk, which makes the dough ferment and build gases. I planned to get the milk from the hotel breakfast; however, I was lazy in my measuring and only had enough for one bag. Oops...one bag continued on and the other went into the trash.

Well the next day, I left my surviving bread unattended in the hotel room when we out in the Lake for about 6 hours. When we returned, I was shocked and saddened to find out that my bag had exploded because of the gases that it created. Sad times...I had to throw that batch away too. So, there I was without any Amish Friendship Bread and I was quite sad.

The Sunday that we returned from our trip, Jeremy worked and told Jake and Kayla about our unfortunate event and guess what! They brought me another bag yesterday!! Thanks you guys! The bag they brought me was already at day 10, so I baked my loafs last night and created 3 starters of my own. I'm planning to keep one starters so that I can make more bread and play with the recipe a bit.

This bread is a bit heavy on the ingredients, but it's worth it because it's wonderfully delicious. I took one loaf into work today and it was gone in about an hour! So, all you need is to receive a starter bag from a friend and you can make this tasty bread. :)

IMG_0889

One of my starters to give away.

IMG_0888

The loaf all cooked in the pan.

IMG_0890

All sliced up and ready to go to work with me.

Amish Friendship Bread

Important Note: Don't use metal spoons or equipment. Do not refrigerate. Use only glazed ceramic or plastic bowls or containers. Gases will be created as bread ferments, release air from bag, if necessary.

1 cup of starter mix

Day 1:
Do nothing with the starter.
Days 2-5:
Mash the bag.
Day 6:
Add 1 cup flour, 1 cup sugar, and 1 cup milk. Mash the bag.
Days 7-9:
Mash the bag.
Day 10:
Add 1 cup flour, 1 cup sugar and 1 cup milk. Mash. Take out 3 cups and place 1 cup each into three separate plastic containers. Give one cup and a copy of this recipe to three friends. To the balance (a little over one cup) of the batter, add the following ingredients and mix well.

1 cup oil
1/2 cup milk
3 eggs
1 tsp vanilla

2 cups flour
1 cup sugar
1-1/2 tsp baking powder
2 tsp cinnamon
1/2 tsp baking soda
1 - (5.1 oz) box instant vanilla pudding
1/2 tsp salt

1/2 cup sugar

1 tsp. cinnamon
Optional: 1 cup nuts, 1 cup raisins, anything you'd like!

Add dry ingredients to wet ingredients. Mix well. Grease two bread pans. Mix 1/2 cup sugar and 1 tsp. cinnamon. Sprinkle half the cinnamon sugar mixture on bottom of pan. Pour batter into two the well greased and sugared bread pans. Sprinkle remaining mixture on top. Bake at 325 degrees for 1 hour. Let cool and enjoy!

Thursday, July 10, 2008

Company is Coming to Dinner

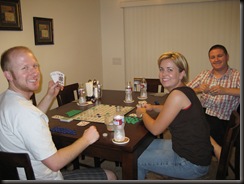
I LOVE having people over for dinner!  Mostly I enjoy it because it's fun having friends over to hang out for the night, but also because I don't have to cut recipes in half or make small side dishes since it's usually just Jeremy and me.  Tonight we had our good friends, Jake and Kayla over for dinner, dessert and of course, board games!

IMG_0782

On the menu were 2 new recipes and 2 old standbys.  The new ones were: Pineapple Teriyaki Burgers and Frozen English Toffee Cake.   And the old standbys were Cheesy Potatoes and baked beans (from a can). 

I get off of work at 5pm and Jake and Kayla were coming over at 6pm, so right after I walked in the door, I started cooking.  I knew my time was limited before they arrived, so the first thing to do was to get the Cheesy Potatoes into the oven, since they take the longest.  I made a special stop at the grocery store on the way home for the cream of chicken soup for the potatoes...and sadly, wouldn't you know it....in my rush to get it in the oven, I completely forgot to put the soup into the mix.  Oops!  (But they still turned out delicious!)IMG_0780 

Next came the burgers.  The recipe is from Semi-Homemade with Sandra Lee on the Food Network!  LOVE her!  I saw her make this recipe last weekend and I thought they looked tasty.   The burgers have onion seasoning mix, teriyaki mix, pineapple juice and  a pineapple ring grilled in them.  YUM!  I forgot to get pictures of the burgers, but here is the link to the recipe.

While the potatoes were cooking and Jerm was grilling the burgers, I finished up my cake.  Since I knew I'd be short on time, I baked the cake and made the ice cream layers the night before.  That way, I just had to assemble the layers, frost it and sprinkle on the toffee chips. 

 IMG_0783

The finished cake, about to go into the freezer.

IMG_0781

Playing our new game,"Sequence."

IMG_0784

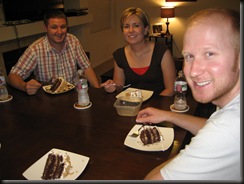
Jake's fancy piece of cake.

IMG_0785

Eating dessert!

What a fun night with friends!  Thanks for coming over guys...see you Saturday at the Circus! :)

Frozen English Toffee Cake

1 box devil's food cake mix

1 1/3 cups water

1/2 cup vegetable oil

3 eggs

1/2 gallon chocolate or vanilla ice cream (or any flavor)

1 bag (10 oz) English toffee bits

1 container (8 oz) Cool Whip


Cake

1. Bake cake as directed on box, in two 8-inch round cake pans.  Cool completely.

Ice Cream Filling

2. Line three 8-inch round cake pans with plastic wrap, allowing 3 inches of plastic to hang over sides.  Divide ice cream equally among pans.  Using rubber spatula, spread ice cream over bottoms of prepared pans, forming smooth, even layers.  Sprinkle 1/4 cup of toffee bits over ice cream in each pan.  Freeze for 3 hours or until solid.

Assembly and Frosting

3. Cut each cake layer horizontally in half.  Working quickly, remove ice cream from pans.  Peel off plastic and place 1 ice cream circle on each of the 3 cake layers.  Stack cake and ice cream layers on top of each other on serving platter.  Frost cake with Cool Whip and sprinkle with remaining toffee bits.  Freeze until ready to serve.  Let stand at room temperature 5 minutes before serving.

Makes 12-16 servings.

Sunday, July 6, 2008

I Baked a Pie!

I love cooking and baking! I have since I was a little kid. I was always trying to help my mom or dad cook when they were in the kitchen. When I get bored, I have the urge to bake something. I love Food Network! I could watch it all day. From Rachael Ray to The Neely's to The Next Food Network Star...it is all so entertaining to me. I love reading "foodie" blogs about cooking, baking and the healthy way people eat! Ask Jeremy... I've found about 20 "foodie" blogs that I read daily. So, I got to thinking...what if I kinda, sorta starting posting about my cooking and baking? That could be fun, right? Well, to the five people out there who actually read this blog...I'm going to start incorporating things that I cook, the process and the recipes, for your viewing pleasure. Let's start with my very first pie...

While watching "Good Eats" last week, Alton Brown was doing his show on apple pie. It looked delicious and made me want to make a pie...even though I'm more of a cake and cookie kinda girl. I would have used Alton's recipe; however, it didn't seem as "figure-friendly" as I would have liked. So, I searched for a recipe and came across this delicious one from Cooking Light magazine.

This Caramel-Apple Crumb Pie is very easy to make and quite tasty, if I do say so myself! Instead of a top crust, there is a yummy crumb and caramel mixture that doesn't overpower the apples. Delicious!

IMG_0775

My ingredients.

IMG_0776

Rolling out the crust. (I only had Whole-Wheat flour, so that's why it's darker than usual)

IMG_0777

Pinto beans as my "pie weights," while the crust baked.

IMG_0778

The apple filling.

IMG_0779

The finished product, cooling on the counter!

Caramel-Apple Crumb Pie

Cooking Light, NOVEMBER 1999

Ingredients

Crust:

1 cup all-purpose flour

1/8 teaspoon salt

2 tablespoons chilled butter or stick margarine, cut into small pieces

2 tablespoons vegetable shortening

3 tablespoons plus 1/2 teaspoon ice water

1 teaspoon cider vinegar

Butter-flavored cooking spray

Filling:

1 tablespoon butter or stick margarine

1/2 cup packed brown sugar

3/4 teaspoon ground cinnamon

9 cups sliced peeled Granny Smith apple (about 2 3/4 pounds)

3 tablespoons all-purpose flour

2 teaspoons lemon juice

Topping:

1/4 cup all-purpose flour

1/4 cup packed brown sugar

2 tablespoons chilled butter or stick margarine, cut into small pieces

1/4 cup fat-free caramel sundae syrup

Preparation

Preheat oven to 375°.

To prepare crust, lightly spoon 1 cup flour into a dry measuring cup; level with a knife. Combine 1 cup flour and salt in a bowl; cut in 2 tablespoons butter and shortening with a pastry blender or 2 knives until mixture resembles coarse meal. Sprinkle surface with ice water, 1 tablespoon at a time; add vinegar. Toss with a fork until moist and crumbly (do not form a ball).

Press mixture gently into a 4-inch circle on heavy-duty plastic wrap; cover with additional plastic wrap. Roll dough, still covered, to a 12-inch circle. Freeze 10 minutes or until plastic wrap can be easily removed.

Remove 1 sheet of plastic wrap; fit dough into a 9-inch pie plate coated with cooking spray. Remove top sheet of plastic wrap. Fold edges under; flute. Line bottom of dough with a piece of foil; arrange pie weights (or dried beans) on foil. Bake at 375° for 15 minutes or until the edge is lightly browned. Remove pie weights and foil; cool on a wire rack.

To prepare filling, melt 1 tablespoon butter in a large nonstick skillet over medium-high heat. Combine 1/2 cup brown sugar and cinnamon. Add sugar mixture and apples to skillet; cook 5 minutes, stirring occasionally. Remove from heat; stir in 3 tablespoons flour and lemon juice. Spoon into prepared crust.

To prepare topping, lightly spoon 1/4 cup flour into a dry measuring cup; level with a knife. Combine flour and 1/4 cup brown sugar in a bowl; cut in 2 tablespoons butter with a pastry blender or 2 knives until mixture resembles coarse meal.

Drizzle syrup over apple mixture; sprinkle topping over syrup. Bake at 375° for 30 minutes or until apples are tender. Cool on a wire rack.

Yield: 10 servings (serving size: 1 wedge)

Nutritional Information:

CALORIES 277(27% from fat); FAT 8.4g (sat 4.2g,mono 2.4g,poly 1g); IRON 1.3mg; CHOLESTEROL 16mg; CALCIUM 33mg; CARBOHYDRATE 50.1g; SODIUM 109mg; PROTEIN 2.1g; FIBER 2.4g